Method 1: CLI Tool (Recommended)
🚀 Recommended: Use the interactive CLI for automatic configuration with smart defaults and validation.
1
Run the CLI tool
pnpm init:env2
Choose environment
Select your target environment: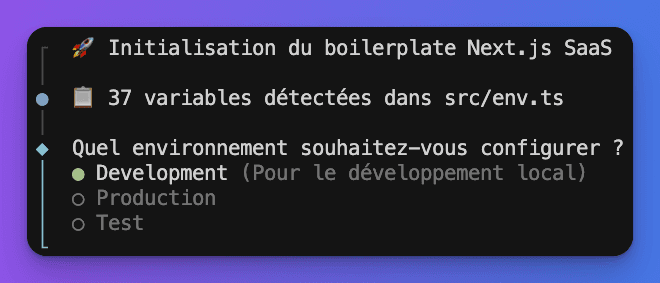
- Development: Local development (creates
.env.development) - Production: Production deployment (creates
.env.production) - Test: Automated testing (creates
.env.test)
3
Configure services
The tool organizes variables into categories:
- Database - PostgreSQL connection
- Authentication - Better Auth settings
- Email - Resend integration
- Storage - Supabase file storage
- Stripe - Payment processing
- Pages & Features - Enable/disable features
- OAuth - Social authentication providers
CLI Features
Smart Defaults:- Auto-generates secure secrets
- Provides development URLs
- Suggests sensible configuration
 Multi-Select Options:
 Validation:
- URL format validation
- Email format checking
- Required field enforcement
Method 2: Manual Configuration
⚙️ Manual Setup: For advanced users who prefer full control over configuration.
1
Copy template
cp .env.example .env.local2
Edit configuration
Open
.env.local and configure your services:code .env.local # VS Code
nano .env.local # Terminal editorRequired Variables
Database Configuration:# PostgreSQL connection (Required)
DATABASE_URL="postgresql://username:password@host:5432/database"
DIRECT_URL="postgresql://username:password@host:5432/database"# Better Auth secret (Required) - 32+ characters
BETTER_AUTH_SECRET="your-super-secret-key-min-32-characters"
BETTER_AUTH_URL="http://localhost:3000"# Resend API key (Required for email)
RESEND_API_KEY="re_xxxxxxxxxxxx"
EMAIL_FROM="noreply@yourdomain.com"Payment Configuration (Stripe)
# Stripe keys (Required for payments)
STRIPE_PUBLISHABLE_KEY="pk_test_..."
STRIPE_SECRET_KEY="sk_test_..."
STRIPE_WEBHOOK_SECRET="whsec_..."- Create account at stripe.com
- Go to Developers → API keys
- Copy Publishable and Secret keys
- Setup webhook endpoint for real-time updates
Storage Configuration (Supabase)
# File storage (Optional)
SUPABASE_URL="https://xxx.supabase.co"
SUPABASE_ANON_KEY="your-anon-key"
SUPABASE_BUCKET="your-bucket-name"
STORAGE_TYPE="supabase"
Social Authentication (Optional)
Google OAuth:GOOGLE_CLIENT_ID="your-google-client-id"
GOOGLE_CLIENT_SECRET="your-google-client-secret"GITHUB_CLIENT_ID="your-github-client-id"
GITHUB_CLIENT_SECRET="your-github-client-secret"Environment Types
Development Environment
File:.env.development or .env.local
# Development-specific settings
BETTER_AUTH_URL="http://localhost:3000"
NEXT_PUBLIC_APP_URL="http://localhost:3000"
LOG_LEVEL="debug"
NODE_ENV="development"
Production Environment
File:.env.production
# Production settings with HTTPS
BETTER_AUTH_URL="https://yourdomain.com"
NEXT_PUBLIC_APP_URL="https://yourdomain.com"
LOG_LEVEL="info"
NODE_ENV="production"- ✅ Use HTTPS URLs
- ✅ Use production Stripe keys
- ✅ Use production database
- ✅ Set proper CORS origins
- ✅ Use strong secrets
Test Environment
File:.env.test
# Test database and mock services
DATABASE_URL="postgresql://localhost:5432/test_db"
BETTER_AUTH_SECRET="test-secret-32-characters-long"
STRIPE_SECRET_KEY="sk_test_mock_key"
LOG_LEVEL="silent"
NODE_ENV="test"
Validation & Security
🔒 Security: Never commit
.env.* files to Git. They contain sensitive credentials.// Variables are validated against these schemas
serverSchema: z.object({
DATABASE_URL: z.string().url(),
BETTER_AUTH_SECRET: z.string().min(32),
STRIPE_SECRET_KEY: z.string().startsWith('sk_'),
// ... more validation rules
})- Use different secrets for each environment
- Rotate secrets regularly
- Use test keys in development
- Validate URLs are properly formatted
- Keep
.env.exampleupdated for team members
Troubleshooting
Common Issues:# Invalid database URL
Error: Invalid DATABASE_URL format
Solution: Ensure URL follows postgresql://user:pass@host:port/db
# Missing required variables
Error: BETTER_AUTH_SECRET is required
Solution: Generate with: openssl rand -base64 32
# Webhook validation failed
Error: Stripe webhook signature invalid
Solution: Check STRIPE_WEBHOOK_SECRET matches your webhook endpoint# CLI won't start
pnpm install && pnpm init:env
# Variables not detected
# Check env-schemas.ts for proper exports
# Restart CLI after schema changesNext Steps
✅ Environment configured! Continue with database setup to complete your development environment.
- Database Setup - Initialize your database
- Authentication - Configure auth providers
- Stripe Integration - Setup payment processing
💡 Pro tip: Use the CLI tool's multi-environment support to easily manage development, staging, and production configurations.